Chicks 1 Week Old – Getting started
Introduction
Importance of Raising Healthy Chicks
Raising healthy chicks is the cornerstone of a thriving flock. Ensuring their well-being from the start sets the foundation for robust and productive adult chickens. Healthy chicks are more likely to grow into strong, egg-laying hens or vigorous roosters. Plus, a good start means fewer health issues and lower mortality rates as they grow. This journey is both rewarding and educational, and with the right approach, it can be a joyful experience.
My Experience with One-Week-Old Chicks
Reflecting on my first week with chicks, I recall a blend of excitement and concern. Every peep and flutter seemed to demand immediate attention. Over time, I learned the nuances of their needs. For instance, maintaining the right temperature in the brooder was crucial. Too hot or too cold, and the chicks would become stressed, leading to health issues. Providing fresh water and balanced feed also played a significant role in their development. Through trial and error, I developed a set of best practices that I’m eager to share.
Getting Started
Preparing the Brooder
Creating a safe and comfortable space for your chicks is your first task. The brooder is their home for the next few weeks, and its setup is vital.
1. Choose the Right Size: Ensure the brooder is spacious enough for the number of chicks. Overcrowding can lead to stress and injury.
2. Heat Source: Use a heat lamp or brooder plate. Position it to create a temperature gradient, so chicks can move to their preferred warmth level.
3. Secure Enclosure: The brooder should be secure to prevent chicks from escaping and predators from entering. A wire mesh top works well.
4. Easy to Clean: Select a brooder that is easy to clean. Chicks are messy, and regular cleaning is necessary to prevent disease.
5. Ventilation: Good airflow is essential to avoid respiratory issues. Ensure the brooder has adequate ventilation without drafts.
Choosing the Right Bedding
Bedding choice impacts both hygiene and comfort for your chicks. The right material will keep them dry and warm.
1. Pine Shavings: Pine shavings are a popular choice. They are absorbent and provide good insulation. Avoid cedar shavings as they can be toxic.
2. Paper Towels: For the first few days, using paper towels over the bedding can help chicks find their food easily and prevent leg problems.
3. Straw or Hay: These can be used but tend to mold if they get wet. They are also less absorbent compared to shavings.
4. Sand: Sand is highly absorbent and easy to clean. It also provides grit which helps with digestion. However, it can be cold.
5. Regular Changing: Whatever bedding you choose, change it regularly to maintain a clean environment and prevent ammonia build-up.
Maintaining the Right Temperature
Temperature regulation is crucial for chicks’ health. They are unable to regulate their body temperature in the first few weeks.
1. Thermometer Use: Place a thermometer at chick level to monitor the temperature accurately.
2. Temperature Gradients: Start at 95°F (35°C) for the first week. Reduce the temperature by 5°F each week until they are fully feathered.
3. Chick Behavior: Observe the chicks. If they huddle under the heat source, they are cold. If they stay away, they are too hot.
4. Adjustable Heat Source: Use an adjustable heat lamp so you can change the height and intensity as needed.
5. Night and Day Cycles: Mimic natural day and night cycles by turning off the heat lamp for a few hours at night, once the chicks are a bit older and more resilient.
Feeding Your One-Week-Old Chicks

Selecting the Best Chick Starter Feed
Nutrition is the foundation of healthy growth. Providing high-quality feed ensures your chicks get all the essential nutrients.
1. Chick Starter Crumbles: Opt for crumbles over pellets. They are easier for chicks to eat and digest.
2. Protein Content: Look for a feed with 18-20% protein content. This supports rapid growth and development.
3. Medicated vs. Non-Medicated: Medicated feed helps prevent coccidiosis, a common parasitic disease. Consult a vet to decide if it’s necessary.
4. Fresh Feed: Always use fresh feed to ensure the nutrients are intact and to avoid mold or spoilage.
5. Supplementary Treats: Occasionally, you can offer treats like boiled egg yolk or mealworms, but these should not replace their balanced feed.
Importance of Clean Water
Water is just as important as food. Keeping it clean and fresh prevents disease and encourages healthy growth.
1. Daily Changes: Change water daily to keep it clean and fresh.
2. Use Clean Containers: Use waterers that are easy to clean and disinfect them regularly.
3. Proper Placement: Place waterers at chick height to prevent them from tipping it over or contaminating it with bedding.
4. Avoid Contaminants: Ensure no bedding or droppings get into the water. Use a raised platform if necessary.
5. Electrolytes: Adding electrolytes to the water can help maintain hydration and energy, especially if the chicks are stressed or during hot weather.
Supplementing with Vitamins
Vitamins are crucial for chicks’ overall health, supporting their immune system and growth.
1. Vitamin Supplements: Consider adding liquid vitamin supplements to their water.
2. Balanced Diet: Ensure the chick starter feed is well-balanced with necessary vitamins.
3. Observing Deficiencies: Watch for signs of vitamin deficiencies like leg problems or poor feathering.
4. Natural Sources: Occasionally, provide natural vitamin sources like leafy greens or fruits in small amounts.
5. Consult a Vet: Always consult with a vet before introducing new supplements to avoid overdosing.
Health and Wellness
Identifying Common Health Issues
Early detection of health problems can save your chicks. Knowing what to look for is key.
1. Coccidiosis: Watch for symptoms like bloody droppings, lethargy, and poor growth. Immediate treatment is necessary.
2. Respiratory Issues: Signs include sneezing, nasal discharge, and difficulty breathing. Ensure good ventilation and hygiene.
3. Pasty Butt: This condition is when droppings stick to the vent area, potentially blocking it. Regularly check and clean the vent if necessary.
4. Leg Problems: Splayed legs or curled toes indicate developmental issues. Corrective measures include splints or adjusting the brooder environment.
5. Parasites: Check for external parasites like mites, bed bugs and lice, which can cause discomfort and anemia.
Vaccination and Preventative Measures
Preventing diseases is better than treating them. Vaccinations and good practices keep your chicks healthy.
1. Marek’s Disease: Vaccinate chicks against Marek’s disease, a common and deadly viral infection.
2. Coccidiosis Prevention: Use medicated feed or consult a vet for vaccination options.
3. Biosecurity: Implement strict biosecurity measures to prevent the introduction of diseases. Limit visitors and sanitize equipment.
4. Clean Environment: Maintain a clean brooder environment to minimize the risk of infections.
5. Regular Health Checks: Regularly inspect your chicks for any signs of illness or stress.
Observing Behavior for Signs of Stress
Behavioral changes can indicate underlying health issues or environmental stressors.
1. Lethargy: Active chicks are generally healthy. Lethargy can signal illness or improper brooder conditions.
2. Huddling: If chicks are constantly huddling, they may be cold. Adjust the temperature accordingly.
3. Pecking: Excessive pecking among chicks can indicate overcrowding, boredom, or nutritional deficiencies.
4. Appetite: Healthy chicks have a good appetite. A sudden drop in eating can be a sign of illness.
5. Noises: Chicks make distinct noises. Persistent loud chirping can indicate discomfort or distress.
Handling and Socializing
Gentle Handling Techniques
Proper handling ensures that chicks grow up tame and friendly while reducing stress.
1. Start Early: Begin handling chicks within a few days of hatching to get them accustomed to human interaction.
2. Be Gentle: Always handle chicks gently, supporting their body to avoid injuries. Avoid squeezing or dropping them.
3. Limit Time: Keep handling sessions short initially, gradually increasing the duration as they become more comfortable.
4. Calm Movements: Move slowly and calmly around chicks to avoid startling them.
5. Hand Feeding: Occasionally offer treats from your hand to build trust and encourage positive associations with humans.
Socializing with Humans and Other Chicks
Socializing is crucial for chicks’ mental and physical development.
1. Regular Interaction: Spend time with your chicks daily to help them get used to your presence.
2. Introduce New People: Gradually introduce other family members or friends to help chicks become comfortable with different people.
3. Peer Interaction: Ensure chicks have companions of the same age. Chickens are social animals and thrive in groups.
4. Playtime: Provide safe, supervised playtime outside the brooder to stimulate their minds and encourage exercise.
5. Positive Reinforcement: Use soft, reassuring voices and gentle touches to reinforce positive behavior.
Importance of Routine
A consistent routine helps chicks feel secure and promotes healthy development.
1. Feeding Schedule: Feed chicks at the same times each day to establish a routine and ensure they are eating regularly.
2. Cleaning Schedule: Clean the brooder at regular intervals to maintain hygiene and reduce stress.
3. Handling Routine: Handle chicks at similar times each day to help them get used to the interaction.
4. Light and Dark Cycles: Mimic natural day and night cycles to help chicks develop a healthy sleep pattern.
5. Monitor Progress: Regularly check their growth and health, making adjustments to the routine as needed.
Brooder Maintenance
Cleaning Tips for a Healthy Environment
Keeping the brooder clean is essential for preventing disease and promoting healthy growth.
1. Daily Spot Cleaning: Remove soiled bedding and droppings daily to keep the brooder clean and dry.
2. Weekly Deep Cleaning: Perform a thorough cleaning of the brooder at least once a week, replacing all bedding and sanitizing surfaces.
3. Non-Toxic Cleaners: Use safe, non-toxic cleaners to disinfect the brooder, avoiding harsh chemicals that could harm the chicks.
4. Dry Environment: Ensure the brooder remains dry, as dampness can lead to mold and respiratory issues.
5. Ventilation: Maintain good ventilation to prevent the buildup of ammonia from droppings.
Monitoring for Pests and Diseases
Regular checks help catch issues early before they become serious problems.
1. Visual Inspections: Inspect chicks and their environment daily for signs of pests or disease.
2. Check Bedding: Look for signs of mites or lice in the bedding and on the chicks.
3. Health Monitoring: Watch for symptoms of illness, such as lethargy, loss of appetite, or unusual droppings.
4. Consult a Vet: If you suspect a health issue, consult a veterinarian promptly for diagnosis and treatment.
5. Preventative Measures: Use preventative measures, such as diatomaceous earth in the bedding, to deter pests.
Growth and Development
Tracking Weight and Growth Progress
Monitoring growth ensures chicks are developing properly and receiving adequate nutrition.
1. Regular Weigh-Ins: Weigh chicks regularly, at least once a week, to track their growth.
2. Growth Charts: Use growth charts to compare your chicks’ progress with standard growth rates for their breed.
3. Healthy Weight Gain: Ensure chicks are gaining weight steadily. Slow or rapid weight gain can indicate health or nutritional issues.
4. Adjust Feed: Adjust their diet as needed based on growth trends, ensuring they receive adequate protein and nutrients.
5. Record Keeping: Keep detailed records of weights and health observations to identify patterns or issues.
Recognizing Milestones in Development
Understanding developmental milestones helps you gauge whether your chicks are on track.
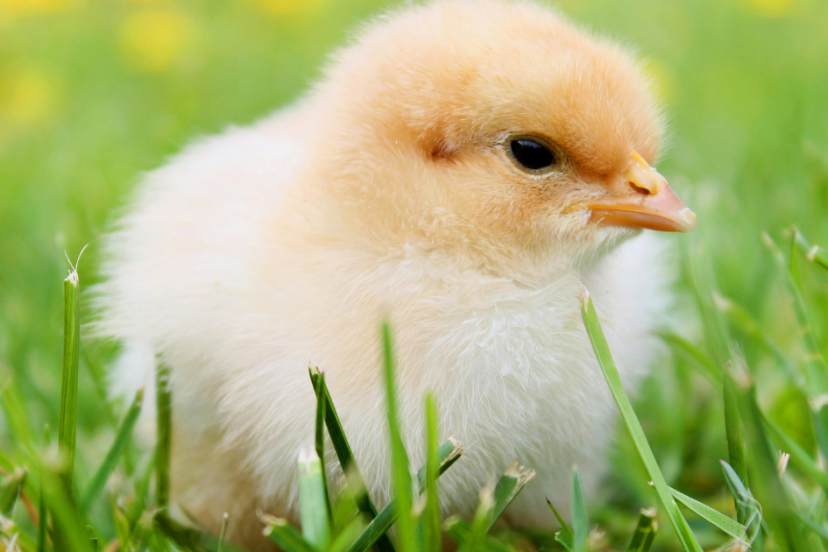
1. Feather Development: Monitor the progression from downy fluff to feathers, which typically starts around one week.
2. Behavioral Changes: Look for changes in behavior, such as increased activity and curiosity.
3. Physical Coordination: Observe improvements in balance and coordination as they grow.
4. Social Hierarchy: Note the establishment of a pecking order, which is a natural part of their social development.
5. Vocalizations: Pay attention to changes in vocalizations, which can indicate growth and health.
Safety Tips
Protecting Chicks from Predators
Ensuring the safety of your chicks from predators is crucial.
1. Secure Brooder: Make sure the brooder is secure with no gaps that predators could exploit.
2. Indoor Placement: Keep the brooder indoors or in a protected area, especially during the night.
3. Monitor Outdoor Time: Supervise chicks closely if they have outdoor playtime, ensuring they are safe from predators.
4. Enclosure Strength: Use sturdy materials for the brooder and any outdoor pens to prevent break-ins.
5. Lighting: Use lighting to deter nocturnal predators, such as raccoons or owls.
### Safe Handling Practices
Safe handling minimizes the risk of injury to both chicks and handlers.
1. Support Body: Always support the chick’s body when handling to prevent stress or injury.
2. Avoid Crowding: Handle one chick at a time to avoid overwhelming them.
3. Gentle Approach: Approach chicks calmly to avoid startling them.
4. Sanitize Hands: Wash your hands before and after handling chicks to prevent the spread of germs.
5. Limit Stress: Avoid handling chicks too frequently to reduce stress and allow them time to rest.
## Conclusion
### Reflecting on the First Week
The first week with your chicks is a learning experience filled with joy and challenges. By providing a safe, clean, and nurturing environment, you’ve set the foundation for their healthy growth. Observing their development and adjusting their care as needed ensures they thrive.
### Looking Forward to the Coming Weeks
As your chicks continue to grow, the care you provide in the coming weeks will be equally important. Keep following best practices, stay vigilant for any signs of distress or illness, and enjoy the journey of raising these delightful creatures.
FAQs
What to Do if a Chick is Not Eating?
If a chick is not eating, check the temperature of the brooder, as improper temperatures can cause stress. Ensure the feed is fresh and accessible. Sometimes, gently dipping their beak in water can stimulate appetite. If the problem persists, consult a veterinarian.
How Often Should the Brooder Be Cleaned?
Perform daily spot cleaning to remove soiled bedding and droppings. A thorough cleaning, including changing all bedding and sanitizing the brooder, should be done at least once a week to maintain a healthy environment.
How Can I Tell if My Chicks Are Too Hot or Too Cold?
Chicks that are too cold will huddle together under the heat source, while those that are too hot will spread out and avoid the heat. Adjust the heat source accordingly to maintain a comfortable temperature.
What Are the Best Bedding Options for Chicks?
Pine shavings are a popular choice due to their absorbency and insulation properties. Avoid cedar shavings, as they can be toxic. Paper towels can be used for the first few days to help chicks find their food.
How Can I Socialize My Chicks?
Spend time with your chicks daily, handling them gently and speaking softly. Offer treats from your hand to build trust. Gradually introduce them to other people and ensure they have companionship from other chicks.
*We may earn a commission from purchases made through our links, at no cost to you. This does not affect our product recommendations. Please see our disclosure to learn more.